Build a Hello World App
Learn how to create a basic live app that outputs “Hello World” to a Quip doc. Then make changes to the live app and view them on a local server before you deploy the changes to Quip.
In this get started guide, you will:
- Create a Live App Project
- Add the live app to a Quip Doc
- View the Changes on the Local Server
- Deploy the Changes
Create a Live App Project
The Quip CLI creates a basic live app project that outputs “Hello World” to a Quip doc. Let’s create one.
-
In the terminal, create a folder where you want all your live apps to be. Substitute
<live-apps-folder-name>for the new folder name and<path>for where you want the folder to be. For example,mkdir /Users/ngalinski/quip-live-apson Mac OS andmkdir C:\quip-live-appson Windows OS. -
Change the directory to that folder.
cd ~/<path>/<live-apps-folder-name> -
Log in to your Quip account.
quip-cli login -
Initialize the Live App project.
quip-cli init -
For the customization parameters, see the table for suggested inputs. These parameters can be changed in the manifest file after the project is created except for switching between TypeScript and JavaScript.
Customization parameter Suggested input What is the name of this app? "My First Live App" Choose a toolbar color Hit Enter Choose a package name Hit Enter What does this app do? Hit Enter Use Typescript? Hit Enter for TypeScript or N for JavaScript Would you like to customize your manifest.json now? Hit Enter Specify an initial width for your app (optional) Hit N -
Change directory to the new project’s folder called "my-first-live-app".
cd my-first-live-app
If you open the project in your favorite code editor, at the root of the project, you can see the manifest.json file. This file contains the project customization parameters. To learn more about these parameters, go to the App Manifest references.
Add the live app to a Quip Doc
Let’s add and view the live app in a Quip doc.
-
Go to the developer console and make sure you see the “My First live app” tile.
-
Open Quip in a new tab.
-
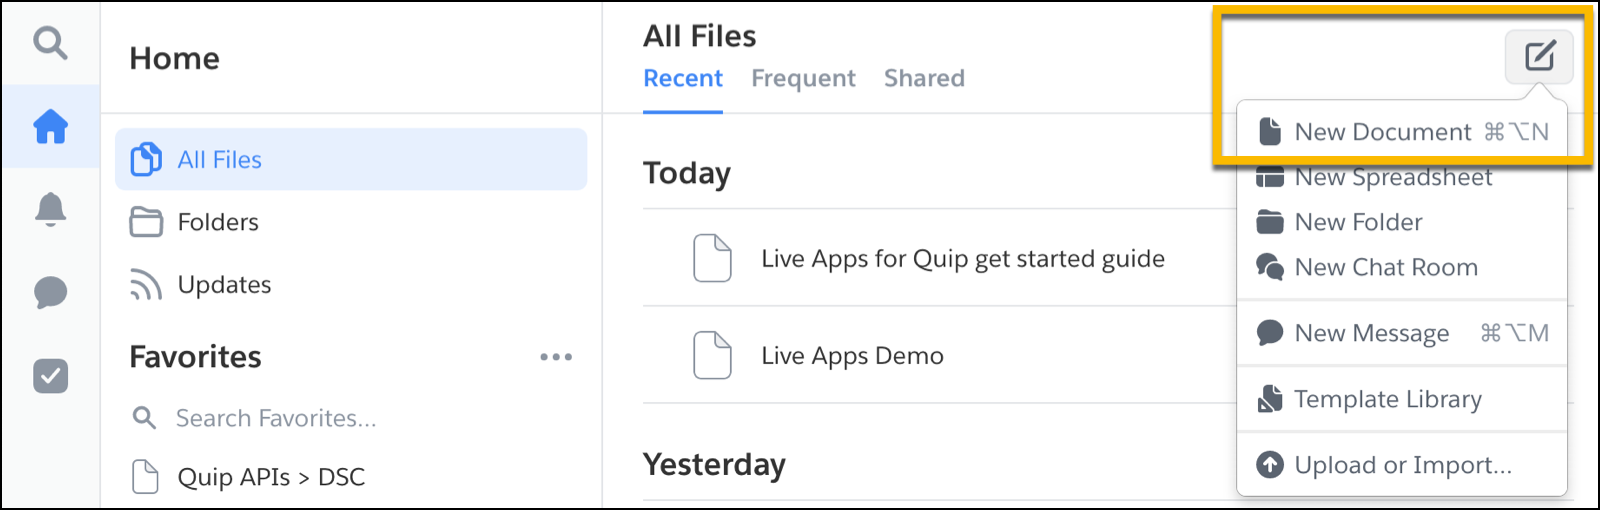
Open a new Quip doc by clicking Compose | New Document and name it “My Live App Doc”.
-
Add your new live app by typing
@my first live appand then click Insert.noteWhen you type
@<...>, all apps appear with a star next to their name.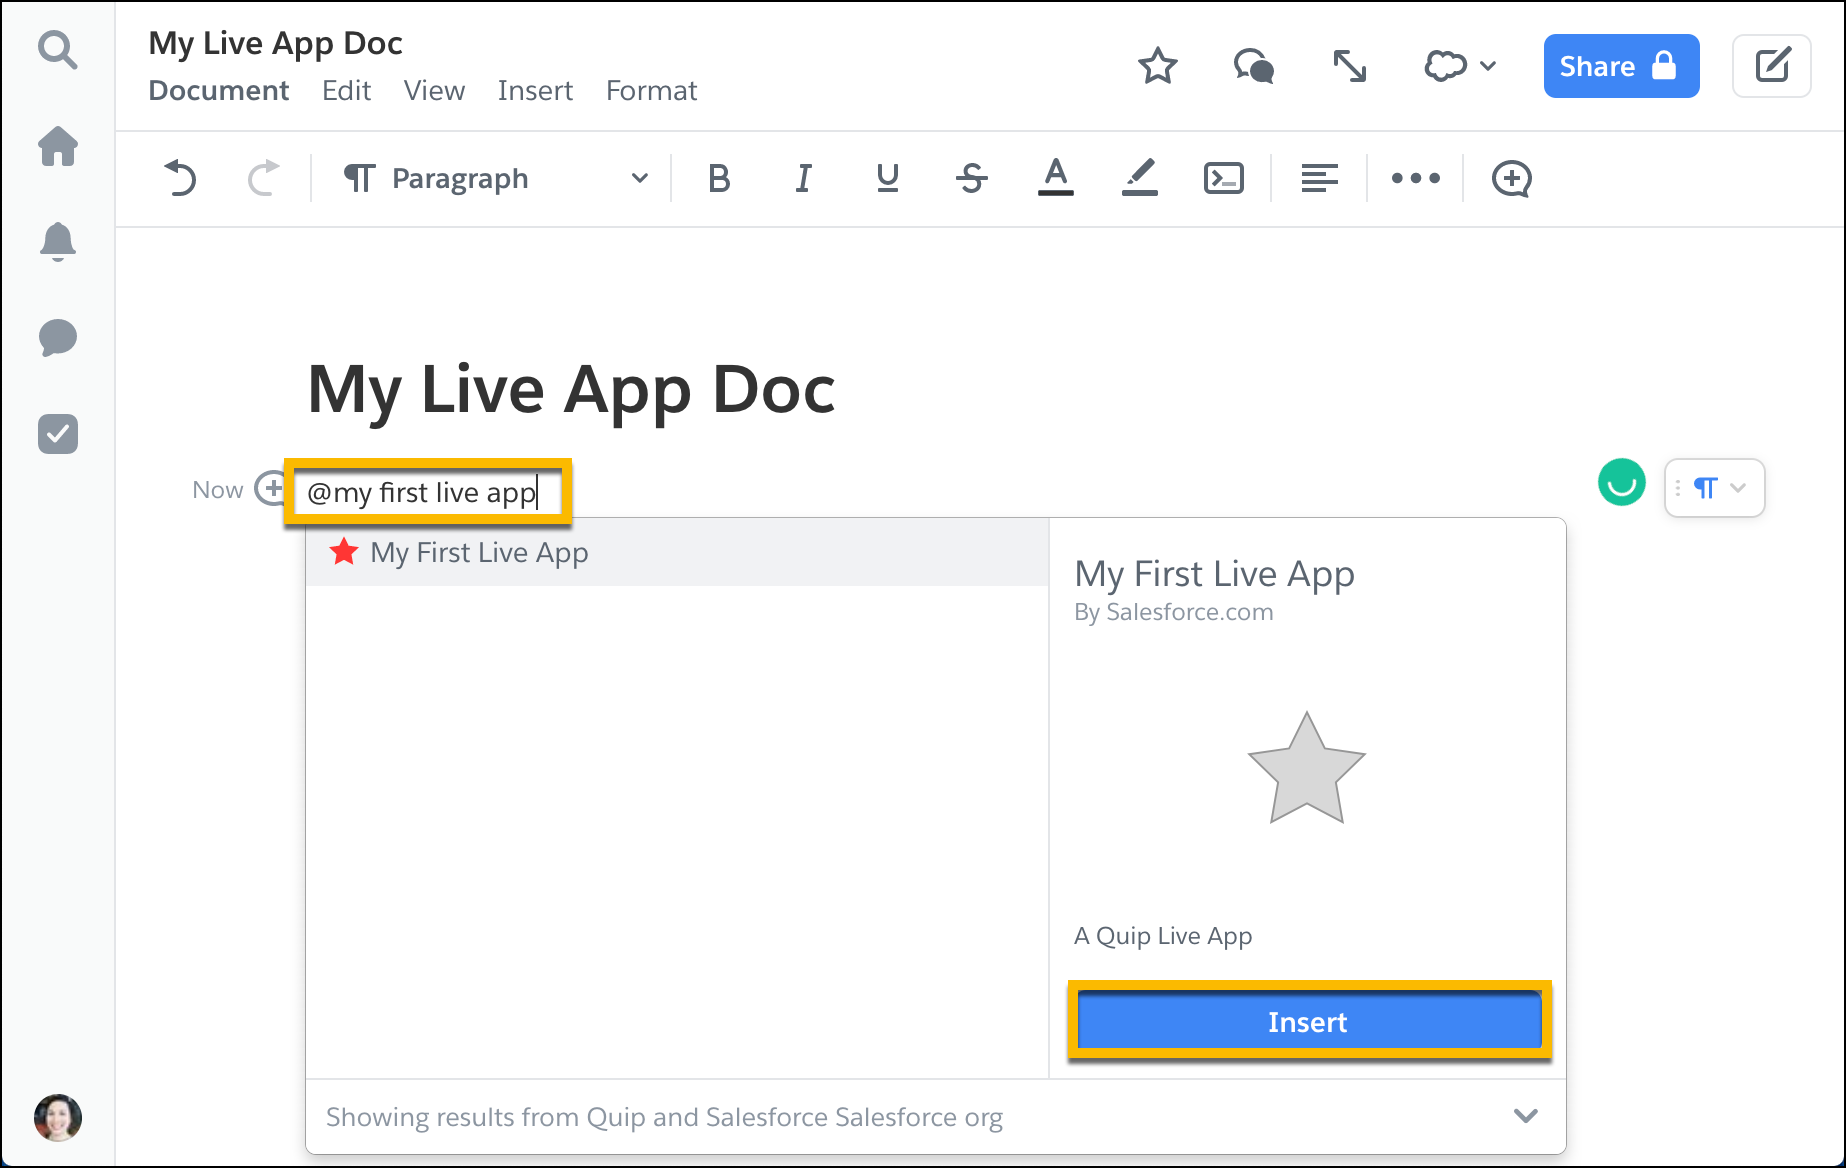
You can now see the live app in your Quip doc. The color of the app name, in this case, is red and is determined by the toolbar color you chose when you initialized the project. This can be changed in the manifest.json file.
View the Changes on the Local Server
You can you make and view changes locally before you push the changes to the Quip server. Let’s make a change now and view the output on the local server only.
-
Start the local server in your live app’s project.
npm start -
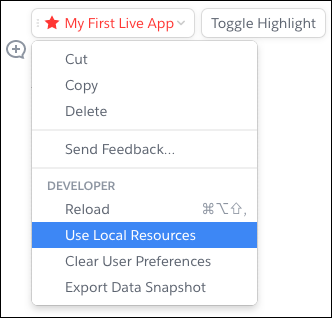
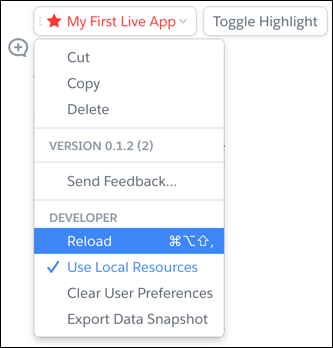
Go to the live app in your Quip doc and from the app’s dropdown menu click Use Local Resources | Enable. Now you’re running on localhost.
 note
noteYou may need to enable self-signed certificates on localhost for HTTPS in your browser as well. Here we point to the localhost so we can load our webpack version of the app into a Quip doc. We have to trust the certificate manually because Quip docs don't allow loading insecure content and it's not possible to generate an SSL certificate for the localhost.
To enable self-signed certificates on localhost for HTTPS, complete the following steps.
- In Chrome, go to the URL chrome://flags/#allow-insecure-localhost. Click Enable | Relaunch.
- In Firefox, go to the URL https://localhost:8888. Click Advanced | Add Exception | Confirm Security Exception.
- In Safari, go to the URL https://localhost:8888. Click Show Certificate |**Continue.**
-
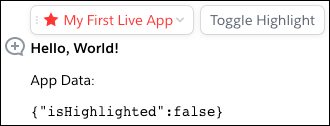
In your project, open the src/components/main.tsx or main.jsx file to make a change to your live app.
-
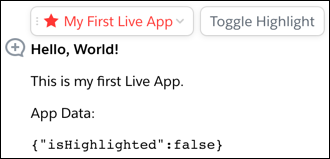
Add another
<p>HTML element to therender()method with any text you wish, for example, “This is my first live app.”
- Typescript
- Javascript
    render() {
        const {data} = this.state;
        const {isHighlighted} = data;
        return (
            <div className={"root"}>
                <div className={isHighlighted ? "highlight" : undefined}>
                    <h1>Hello, World!</h1>
                    <p>This is my first live app.<p>
                    <p>App Data:</p>
                    <pre>{JSON.stringify(data)}</pre>
                </div>
            </div>
        );
    }
-
Go back to the Quip doc and from the app’s dropdown menu select Reload.
You can now see the changes.
Deploy the Changes
Let’s deploy the changes you made on your live app by releasing it as a beta version.
-
Go to the Quip doc and from the app’s dropdown menu deselect Use Local Resources.
-
Go to the terminal and stop running the local server by pressing Ctrl +C to exit the
npm startprocess. -
Run a unit test. This is technically not necessary here because you haven’t made any big changes, but it’s good practice so let’s do it anyway.
npm run test -
Bump the version. Every version of your live app that you deploy is uniquely identified by a version number that you can see in the manifest. Running the bump command automatically increases the version number before you deploy so you don’t run into any errors. You can also use
quip-cli bump major,quip-cli bump minor, orquip-cli bump patchto automatically update the version name and number. For example, if your version name is1.2.1and version number is5, this happens after each of the commands:
quip-cli bump- version name:1.2.1, version number:6quip-cli bump major- version name:2.0.0, version number:6quip-cli bump minor- version name:1.3.0, version number:6quip-cli bump patch- version name:1.2.2, version number:6
-
Build the project.
npm run build -
Publish the changes to the Quip server.
quip-cli publish -
Go to the developer console and click the My First Live App tile.
-
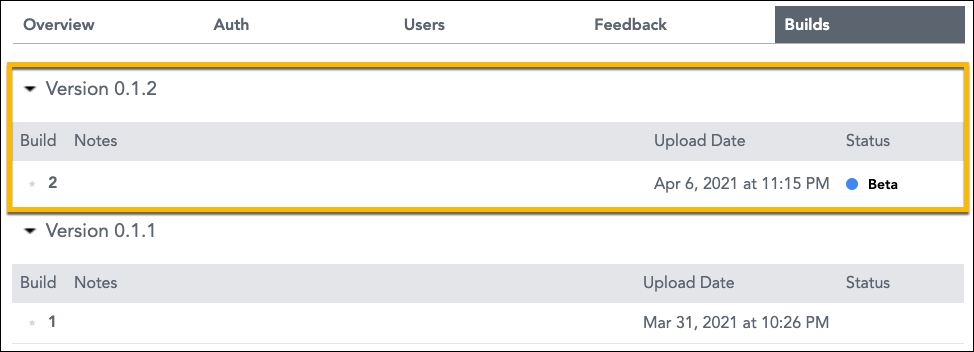
Go to the Builds tab.
-
On the latest version, click Beta Test | Deploy as Beta. The Status now says "Beta".
-
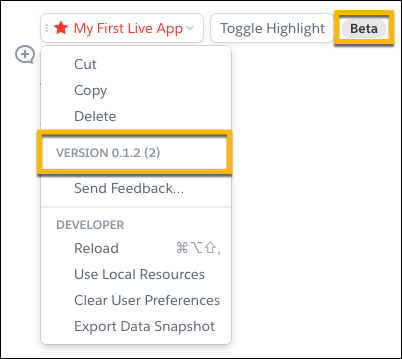
Go back to your Quip doc and reload the page. Your app now has a Beta tag with the version number visible in the app’s dropdown menu.
At this point, the app is visible only to you. If you want others to see the app, you can add them as beta testers or deploy the version to production. For more information, go to Manage Release Cycles.
Congratulations! You created your first live app.